A Hoarder House in Florida: From Chaos to Cozy
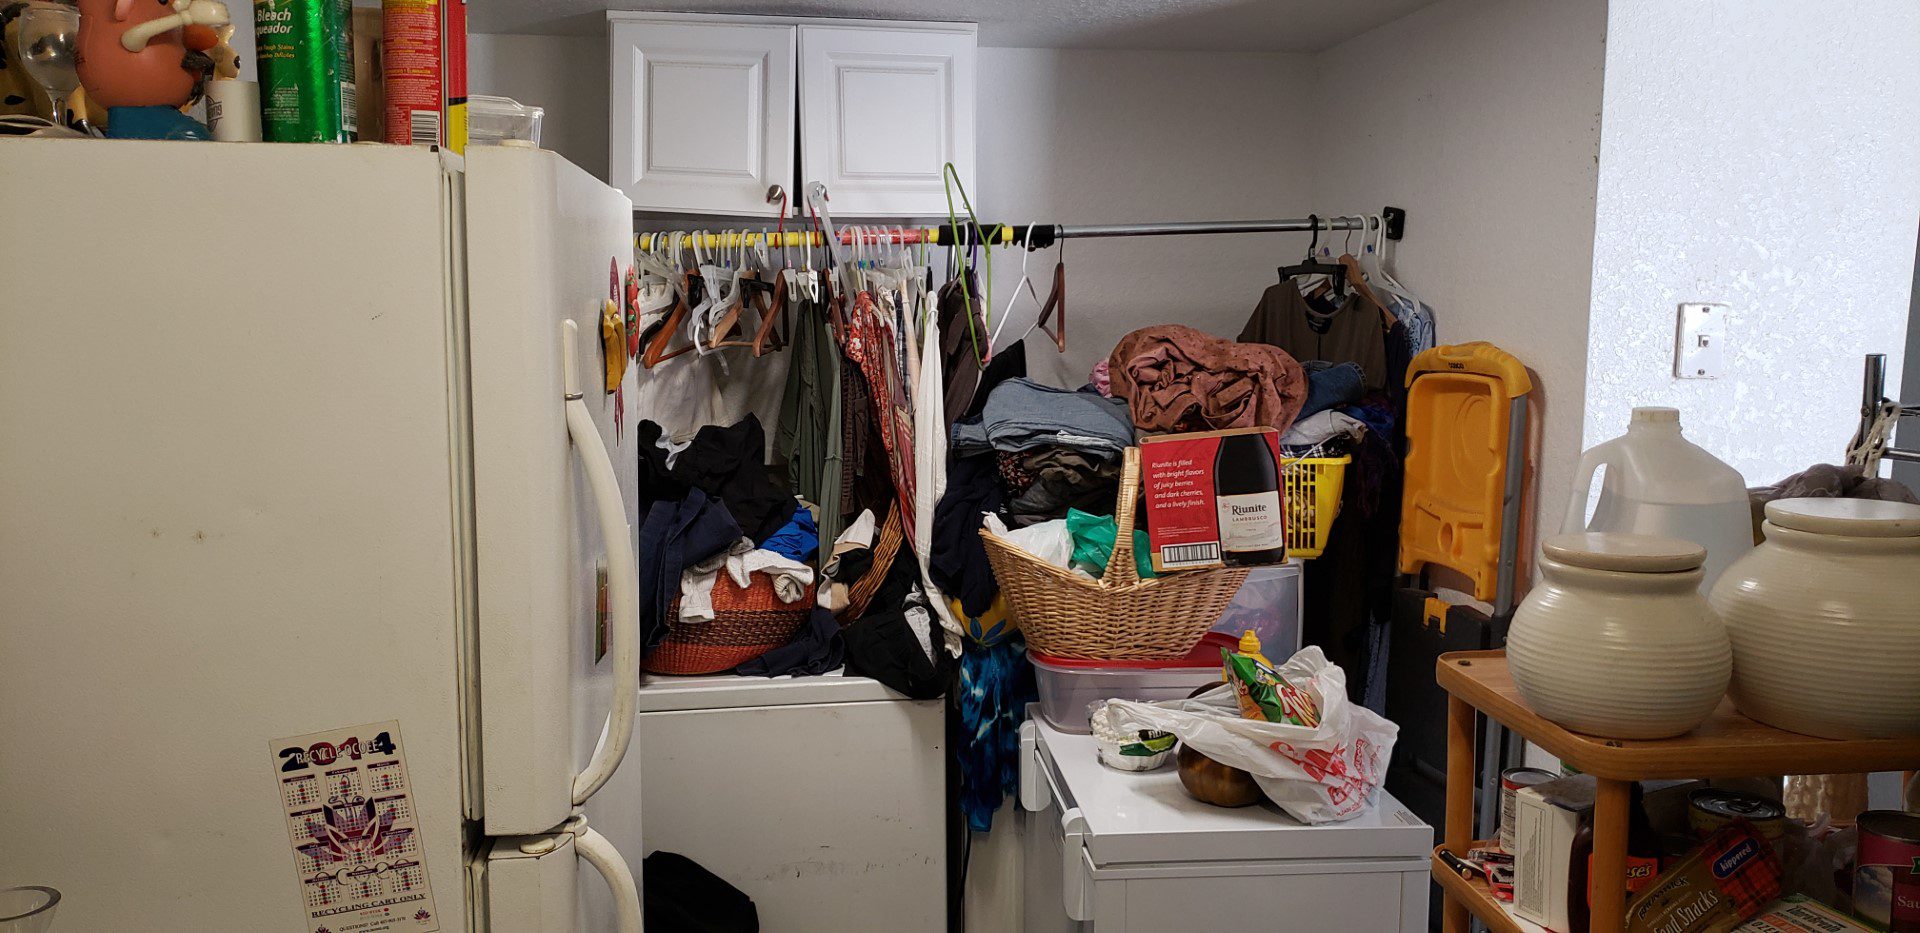
Buying a house is always an adventure, but sometimes the journey from chaos to cozy can be a wild ride. That’s exactly what happened when I purchased a house in Ocoee that seemed to have belonged to a hoarder. This house was a diamond in the rough, hidden under layers of clutter and chaos. The transformation was nothing short of incredible, and I’m excited to share the journey with you.
The Initial Walkthrough
When I first stepped into the house, I was greeted by an overwhelming sight. The living room was packed with items from floor to ceiling, leaving barely any space to walk. The bedrooms were so filled with stuff that the previous owner had resorted to sleeping in a recliner in the living room. Every corner of the house was stuffed with belongings that had accumulated over the years. It was clear that this house needed a lot of work, but I saw its potential.

The Big Cleanout
The first step was to clear out the house. This was no small feat; it took four large dumpsters just to remove all the clutter from this hoarder house. I had a team of professionals to help with the process, and it was all hands on deck. We sorted through mountains of items, deciding what could be donated, recycled, or thrown away. It was a labor-intensive process, but it was also therapeutic in a way. Watching the house slowly empty out, revealing the bones of what could be a beautiful home, was incredibly satisfying.
The Renovation Begins: The Bathroom
Once the house was cleared out, the real fun began: the renovation. We started with the bathroom, which was outdated and in desperate need of a makeover. I wanted to create a space that was both modern and functional. We installed new fixtures, including a sleek vanity with plenty of storage, a contemporary toilet, and a stylish showerhead. The new lighting fixtures added a touch of elegance, and the updated tiles gave the bathroom a fresh, clean look. It was amazing to see how these changes instantly modernized the space.
Flooring: From Old and Worn to New and Inviting
Next, we turned our attention to the floors. The living room and kitchen had old, worn-out flooring that had seen better days. We decided to install porcelain tile in these areas, which not only looks beautiful but is also incredibly durable and easy to clean. The tiles we chose had a subtle, neutral pattern that added a touch of sophistication without overwhelming the space.
For the bedrooms, we opted for luxury vinyl plank (LVP) flooring. LVP is a fantastic choice for bedrooms because it’s both stylish and comfortable underfoot. It’s also resistant to moisture and scratches, making it perfect for a home that’s going to see a lot of activity. The warm, wood-like appearance of the LVP gave the bedrooms a cozy, inviting feel that buyers love and allows you to sell a house quickly.
A Fresh Coat of Paint
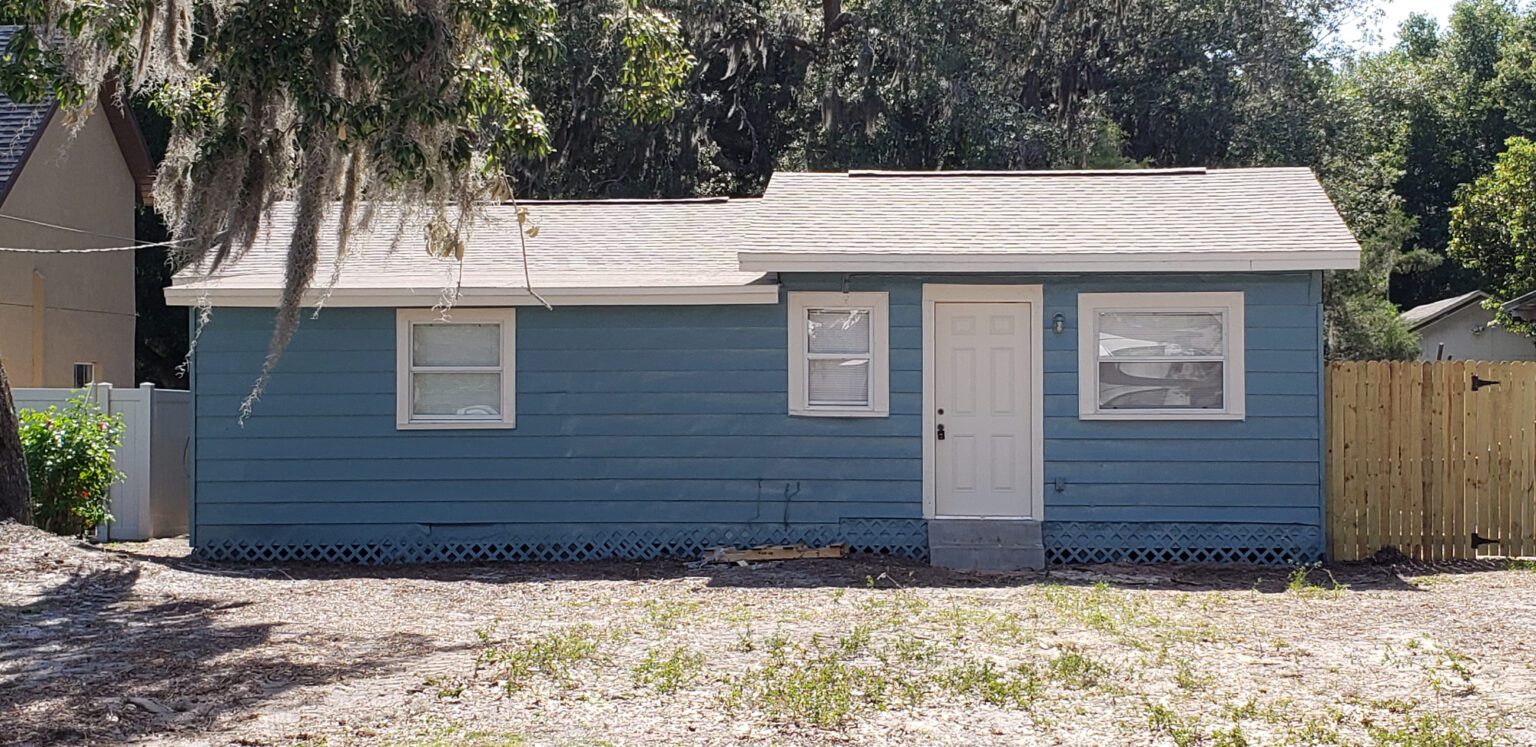
With the flooring in place, it was time to tackle the walls. A fresh coat of paint can do wonders for a home, and this house was no exception. We chose our favorite Sherwinn Williams Accessible Beige for the entire house interior, which helped to create a cohesive and calming atmosphere and complemented the porcelain tiles beautifully while highlighting the warmth of the LVP flooring. The exterior of the house also got a makeover with a fresh coat of paint, making it look brand new. We chose a cheery blue for that cottage feel.
The Final Touches
With the major renovations complete, it was time for the finishing touches. We added new baseboards and trim throughout the house, which gave each room a polished look. New light fixtures were installed, adding both style and functionality. We also updated the hardware on all the doors and cabinets, giving the house a modern and cohesive feel.
Reflecting on the Journey
Looking back on this project, it’s amazing to see how far the house has come. What started as a cluttered, chaotic space is now a beautiful, welcoming home. The transformation wasn’t just about the physical changes; it was about breathing new life into a space that had been neglected for so long.
This experience reminded me of the importance of seeing potential in places that others might overlook. It also reinforced the value of hard work and perseverance. Renovating this house was a labor of love, and the end result was well worth the effort.
Tips for Tackling a Hoarder House
If you’re considering taking on a similar project, here are a few tips to keep in mind:
- Be Patient: Clearing out a hoarder’s house is a massive task, and it can be overwhelming. Take it one step at a time and don’t get discouraged.
- Don’t Do It All Yourself: Don’t be afraid to bring in help. Hiring laborers or professional trash-out guys can make a huge difference in the initial cleanout.
- See the Potential: It’s easy to get caught up in the mess, but try to envision what the space could be. Look beyond the clutter to see the home’s true potential.
- Plan Your Renovation: Once the house is cleared out, make a detailed plan for the renovation. Prioritize the most important updates and create a timeline for the work.
- Enjoy the Process: Renovating a home is a big job, but it can also be incredibly rewarding. Enjoy the journey and take pride in the transformation.

Renovating this hoarder house in Florida was a challenging but incredibly rewarding experience. From the initial cleanout to the final touches, every step of the journey brought its own set of challenges and triumphs. Today, the house stands as a testament to what can be achieved with vision, hard work, and a little bit of patience. Whether you’re a seasoned flipper or a first-time renovator, I hope this story inspires you to take on your own projects and turn chaos into cozy.

